Lutowanie SMD odnosi się do procesu lutowania elementów elektronicznych do montażu powierzchniowego na płytkach drukowanych. W miarę jak urządzenia elektroniczne i płytki drukowane stają się coraz mniejsze, sposób użycia Komponenty SMD gwałtownie wzrosła w projektowaniu obwodów. Niewielki rozmiar komponentów SMD umożliwia znacznie większą gęstość komponentów na płytkach drukowanych i pozwala na miniaturyzację nowoczesnej elektroniki. jednak, ich niewielka powierzchnia stwarza również pewne wyjątkowe wyzwania w zakresie montażu i lutowania. W tym przewodniku, omówimy najważniejsze narzędzia & materiały, the step-by-step process for properly soldering SMD components and master SMD soldering rework.
Niezbędny Narzędzia do lutowania SMD & Materiały
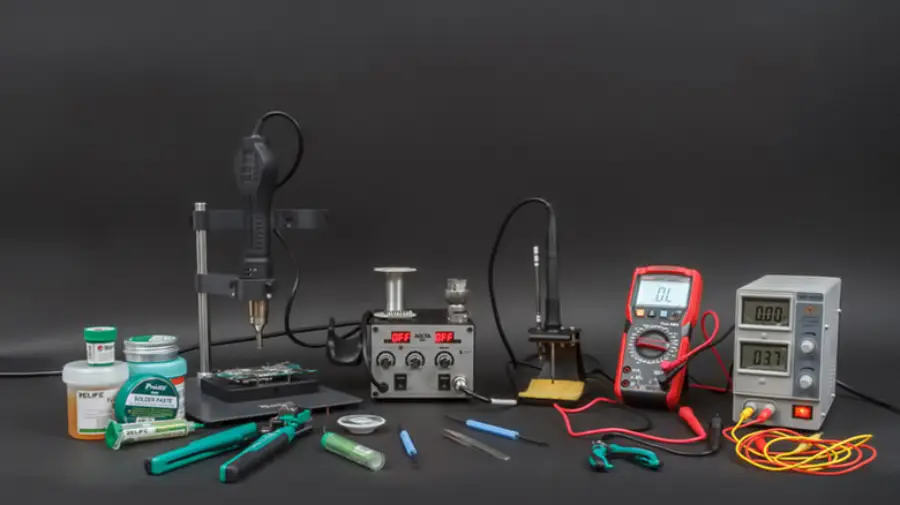
Lutowanie urządzeń do montażu powierzchniowego wymaga specjalistycznych narzędzi do obsługi drobnych elementów i wykonywania precyzyjnych połączeń lutowanych. Oto niektóre z niezbędnych elementów, których będziesz potrzebować:
Lutownica – lutownica z cienką końcówką w zakresie mocy 15-30 W jest idealna do prac SMD. Można stosować końcówki o średnicy zaledwie 0,5 mm. Funkcje kontroli temperatury pomagają uniknąć przegrzania.
Hot Air Soldering Gun – Use hot air to melt solder or solder paste, equipped with different gun tips.
Strumień – Usually rosin solution or flux paste. Pen-type or needle-type applicators allow for better control of the amount used.
Cleaning Agent – PCB cleaner or isopropyl alcohol, usually combined with a brush or cotton swabs, is used to remove residual flux.
Solder Paste– Solder paste consists of a mixture of powdered solder alloy and flux cream. Umożliwia precyzyjne nałożenie lutu na podkładki SMD przed umieszczeniem komponentów.
Mikroskop – mikroskop stereoskopowy lub szkło powiększające są niezbędne do kontroli małych połączeń lutowanych i rozmieszczenia komponentów. Typowy jest mikroskop o powiększeniu od 20x do 40x.
Pęsety – pęsety z cienką końcówką umożliwiają precyzyjne manipulowanie i umieszczanie elementów SMD o wielkości zaledwie 0201 lub 01005 rozmiary (0.25mm x 0,125 mm). Preferowane są pęsety antystatyczne.
Pomocne dłonie w lutowaniu – Pomocne dłonie z soczewkami powiększającymi umożliwiają pozycjonowanie płytek drukowanych pod mikroskopem bez użycia rąk podczas lutowania.
Stencil – Szablony PCB to cienkie blachy wycinane laserowo z układem otworów pasującym do układu pola lutowniczego na płytce PCB. Do nakładania pasty lutowniczej, szablon jest wyrównywany z płytką PCB, a pasta jest przesiewana na podkładki przez otwory szablonu. Użycie szablonu umożliwia precyzyjne i wydajne nałożenie pasty lutowniczej przed umieszczeniem elementów SMD.
Przyrządy – Przyrządy pomagają ustawić płytki pod kątem, co poprawia widoczność i dostęp do połączeń lutowanych pod komponentami podczas lutowania ręcznego.
Przyssawki lutownicze/narzędzia do rozlutowywania – specjalistyczne narzędzia próżniowe służą do usuwania lub przeróbki połączeń lutowanych i elementów rozlutowujących w celu naprawy.
How to Do SMD Soldering: A Professional Step-by-step Guide
Przygotuj płytkę drukowaną, dokładnie ją czyszcząc, aby usunąć wszelkie zanieczyszczenia lub utlenianie, które mogą być obecne. You can then start SMD soldering with a soldering iron or a hot air soldering gun.
Lutowanie SMD with Soldering Iron
Krok 1: Aplikacja strumieniowa
Use a flux pen to evenly cover all SMD pads with flux. For leadless ceramic ICs, pre-tin pads with solder (work quickly at a moderate temperature to avoid over-melting).
Krok 2: Umieszczanie komponentów
Use anti-static tweezers to precisely place the chip on the PCB naramienniki. Check thoroughly to ensure that each terminal is aligned with its respective pad.
Krok 3: Corner Tack Soldering
Put a little solder on the soldering iron tip to solder the diagonal corners of the chip and hold it in place. Recheck alignment before the next step.
Krok 4: Flux Reapplication
Use the flux pen again to apply a fresh layer of flux over the pins and pads, ensuring smooth solder flow and preventing oxidation.
Krok 5: Drag Soldering with a Mini Wave Tip
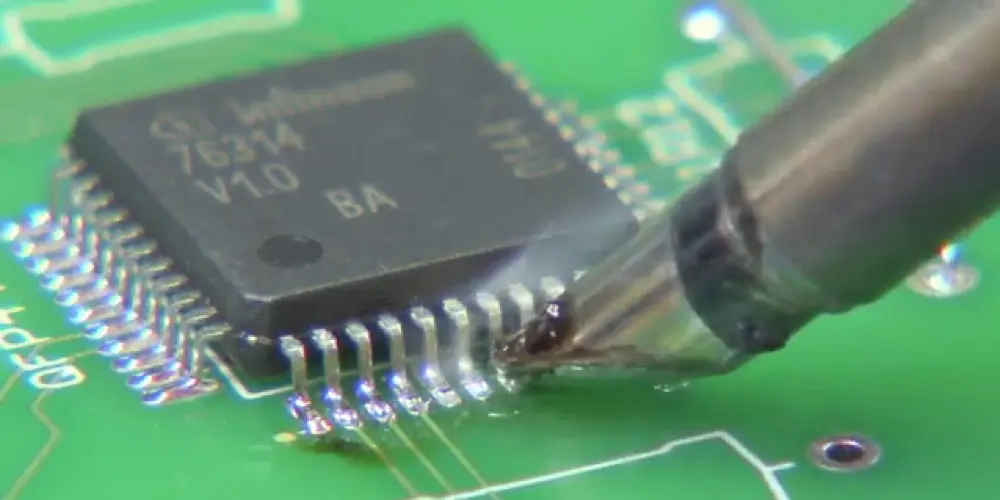
Use a mini wave tip to drag soldering, which has a solder reservoir at its head. Firstly load the reservoir with molten solder. Gently touch the outer ends of the pins and QFP pads with the tip. Slightly lift the tip by about 0.5 mm to allow molten solder to flow from the reservoir into the pad and pin area, forming a solder joint. W tym kroku, pay attention to the hand gestures. The axis of the soldering iron tip should form an angle of 30°to 45°with the edge to be soldered. Do not drag soldering too fast, and control it to drag through one soldering point in about 1 druga.
Krok 6: Końcowa Inspekcja & Czyszczenie
Once soldering, thoroughly inspect each solder joint under a microscope to check for any shorts or poor soldering that require rework. For short circuits, apply flux and re-drag (maks 2 attempts per area). If the soldering is not done properly once, wait until it cools down before soldering again. (≤3 reworks total). While there are no defects, perform a clean process.
Lutowanie SMD z Hot ZAir Soldering gun
Krok 1: Pre-Soldering Inspection
Inspect the PCB pads for adequate solder bumps. If the solder amount is insufficient, apply a small amount of solder on the pads with a soldering iron. If there is no solder bump, deposit solder paste on the pads using the PCB stencil.
Krok 2: Aplikacja strumieniowa
Apply flux to both the component pins and the pads to improve adequate wetting during the reflow process.
Krok 3: Umieszczanie komponentów
Use tweezers to position the SMD component accurately on the PCB pads. Make sure the leads are properly aligned with the pads.
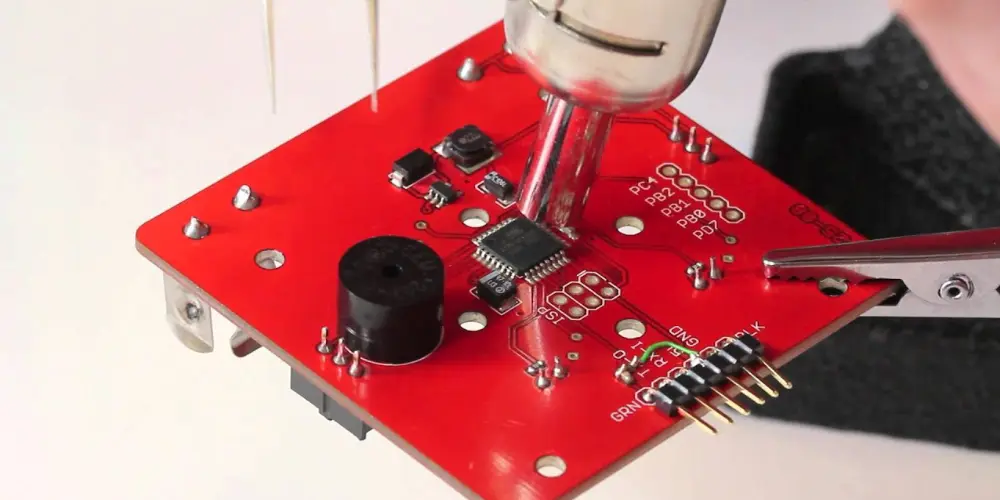
Krok 4: Rozgrzewanie
Before soldering, use the hot air gun to gently preheat the area around the component. This prevents thermal shock and ensures even heating.
Krok 5: Przepływ Proces lutowania
Apply hot air to the component evenly till the solder melts and reflows. For small SMD components, surface tension will help the component auto-align into the correct position. When working with QFP components, pay attention to pin alignment during heating. It’s recommended to solder one row of pins first, verify for alignment, and then solder the other rows.
Krok 6: Końcowa Inspekcja & Czyszczenie
Po zakończeniu lutowania, inspect for any potential defects. Clean the circuit board with isopropyl alcohol and a brush or cotton swabs to eliminate any residual flux.
Wskazówki, których należy przestrzegać podczas procesu lutowania
- Używaj najniższej efektywnej temperatury lutownicy, aby uniknąć uszkodzenia wrażliwych elementów.
- Utrzymuj grot lutowniczy w czystości pomiędzy złączami, aby zapewnić optymalne przenoszenie ciepła do złącza.
- Apply just enough solder to form a proper fillet on each joint. Insufficient or excess solder can lead to unreliable connections.
- Obserwuj przepływ i zwilżanie lutu i w razie potrzeby ponownie nałóż topnik lub podkładki cynowe.
- Unikaj dotykania i uderzania płytki drukowanej, dopóki wszystkie połączenia lutowane nie ostygną i nie stwardnieją.
- Visually inspect underneath components like BGAs and QFNs if possible.
- Brać ESD prevention steps like grounding wrist straps and mats.
- Pracuj systematycznie od środka na zewnątrz lub od małych elementów do większych.
- Utrzymuj podkładki w chłodzie, unikając długotrwałego ogrzewania w jednym miejscu, aby zapobiec podnoszeniu podkładek lub uszkodzeniu płytki drukowanej.
How to Do SMD Soldering Rework?
Ponowna obróbka lutowania urządzeń do montażu powierzchniowego to delikatny proces, ale niezbędna umiejętność Naprawa PCB i modyfikacja. Chociaż należy zachować szczególną ostrożność, można skutecznie wylutować i wymienić elementy SMD bez powodowania uszkodzeń płytki. We will then introduce how to do SMD soldering rework using a hot air soldering gun and a soldering iron.
Desoldering with a Soldering iron
Apply flux on the component pins and select an appropriate soldering iron tip with 200-400℃ temperature. Heat the pins to melt the solder and remove the components with tweezers. The operation is slightly different for various types of components. The following are the specific details.
Two-Terminal SMD Components – Begin by applying solder to one end and heating it using the soldering iron. While the solder is melting, quickly heat the other end. When both ends are molten, use tweezers to remove the component. You can use two soldering irons to heat both ends at the same time.
Dual In-line Package (ZANURZAĆ) układy scalone – Apply flux to the pins, then pile solder along one row. Move the soldering iron along the row of pins to melt the solder. Insert tweezers between the IC and pads on the molten side and lift to separate the pins. Remove excess solder with a soldering iron or solder wick. Repeat the operation for the other side to remove the component thoroughly.
Pakiet Poczwórny Płaski (QFP) układy scalone – Apply flux to the pins and solder wick. Place the solder wick over the row of pins and heat with a soldering iron. Insert a thin non-wettable steel shim between the pins and the pads to lift them. Repeat for all sides until the chip is off.
Desoldering with za Hot Air Gun
Apply flux on the component pins and hold the components with tweezers. Preheat the components around with a hot air gun, then blow on the components. Do not stay in one place and move the hot air gun head quickly to heat each pin. When the pin solder is melted, remove the components with tweezers. Wreszcie, clean the pads for re-soldering.
What you should keep in mind:
-Perform the overall pre-heating, usually for 30 sekundy.
-Choose the gun tip according to the shape of the component, using a tubular gun tip in general.
-Keep the gun tip perpendicular to the circuit board as much as possible and about 10 mm away from it.
-Ogólnie, set the wind speed to 1-3 levels and heat to 5 levels.
Końcowe przemyślenia
Lutowanie SMD może początkowo wydawać się trudne ze względu na pracę z absurdalnie małymi komponentami i złączami. Ale z odrobiną praktyki, odpowiednie narzędzia, i stosując solidną technikę, z powodzeniem możesz lutować elementy niemal dowolnej wielkości. Elementy do montażu powierzchniowego stają się coraz mniejsze, a płyty coraz gęstsze, nauka umiejętności lutowania SMD staje się koniecznością dla każdego początkującego PCB i hobbysty elektroniki.