Unter SMD-Löten versteht man den Prozess des Lötens oberflächenmontierter elektronischer Komponenten auf Leiterplatten. Da elektronische Geräte und Leiterplatten immer kleiner werden, die Verwendung von SMD-Komponenten ist im Schaltungsdesign sprunghaft angestiegen. Die geringe Größe von SMD-Bauteilen ermöglicht eine weitaus höhere Bauteildichte auf Leiterplatten und ermöglicht die Miniaturisierung moderner Elektronik. jedoch, Ihr geringer Platzbedarf stellt auch einige einzigartige Herausforderungen bei der Montage und beim Löten dar. In dieser Anleitung, Wir werden die wichtigsten Tools durchgehen & Materialien, the step-by-step process for properly soldering SMD components and master SMD soldering rework.
Essentiell SMD-Lötwerkzeuge & Materialien
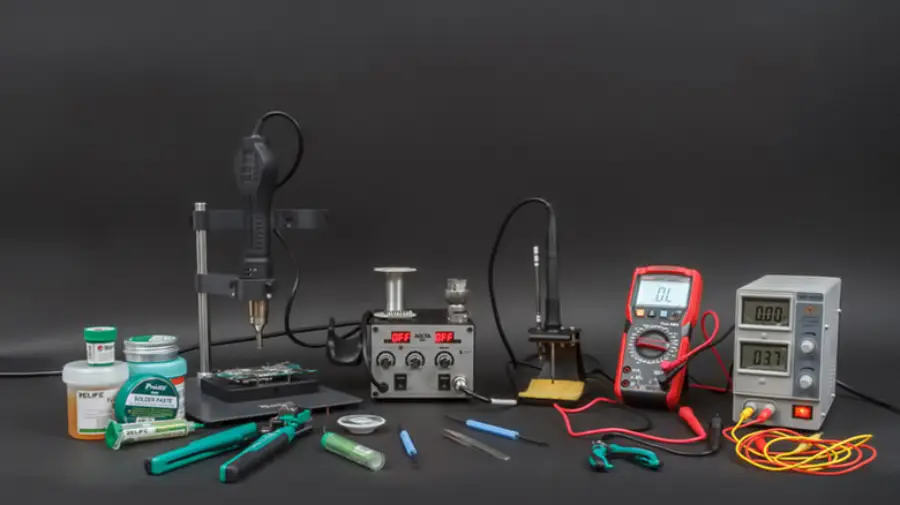
Beim Löten von oberflächenmontierten Geräten sind einige Spezialwerkzeuge erforderlich, um winzige Komponenten zu handhaben und präzise Lötverbindungen herzustellen. Hier sind einige der wichtigsten Dinge, die Sie benötigen:
Lötkolben – Ein Lötkolben mit feiner Spitze im Leistungsbereich von 15–30 W ist ideal für SMD-Arbeiten. Es können Spitzen mit einer Größe von nur 0,5 mm verwendet werden. Temperaturkontrollfunktionen helfen, Überhitzung zu vermeiden.
Hot Air Soldering Gun – Use hot air to melt solder or solder paste, equipped with different gun tips.
Fluss – Usually rosin solution or flux paste. Pen-type or needle-type applicators allow for better control of the amount used.
Cleaning Agent – PCB cleaner or isopropyl alcohol, usually combined with a brush or cotton swabs, is used to remove residual flux.
Solder Paste– Solder paste consists of a mixture of powdered solder alloy and flux cream. Es ermöglicht das präzise Auftragen von Lot auf SMD-Pads, bevor Bauteile platziert werden.
Mikroskop – Für die Inspektion kleiner Lötstellen und die Platzierung von Bauteilen sind ein Stereomikroskop oder eine Lupe unverzichtbar. Typisch ist ein Mikroskop mit 20- bis 40-facher Vergrößerung.
Pinzetten – Pinzetten mit feiner Spitze ermöglichen die präzise Handhabung und Platzierung selbst kleiner SMD-Bauteile 0201 oder 01005 Größen (0.25mm x 0,125 mm). Antistatische Pinzetten werden bevorzugt.
Helfende Hände beim Löten – Werkzeuge für helfende Hände mit Vergrößerungslinsen ermöglichen die freihändige Positionierung von Leiterplatten unter einem Mikroskop während des Lötens.
Stencil – PCB-Schablonen sind dünne, lasergeschnittene Metallbleche mit einem Muster von Öffnungen, die zum Lötpad-Layout der Leiterplatte passen. Zum Auftragen von Lotpaste, Die Schablone wird auf die Leiterplatte ausgerichtet und die Paste wird durch die Öffnungen der Schablone auf die Pads aufgetragen. Die Verwendung einer Schablone ermöglicht ein präzises und effizientes Auftragen der Lotpaste vor der Platzierung der SMD-Komponenten.
Vorrichtungen – Vorrichtungen helfen dabei, Platinen in einem Winkel zu positionieren, was die Sicht und den Zugang zu den Lötstellen unter den Bauteilen beim Handlöten verbessert.
Lötsauger/Entlötwerkzeuge – Spezielle Vakuumwerkzeuge werden zum Entfernen oder Überarbeiten von Lötstellen und zum Entlöten von Komponenten für Reparaturarbeiten verwendet.
How to Do SMD Soldering: A Professional Step-by-step Guide
Bereiten Sie die Leiterplatte vor, indem Sie sie gründlich reinigen, um eventuell vorhandene Ablagerungen oder Oxidationen zu entfernen. You can then start SMD soldering with a soldering iron or a hot air soldering gun.
SMD-Löten with Soldering Iron
Schritt 1: Flussmittelanwendung
Use a flux pen to evenly cover all SMD pads with flux. For leadless ceramic ICs, pre-tin pads with solder (work quickly at a moderate temperature to avoid over-melting).
Schritt 2: Komponentenplatzierung
Use anti-static tweezers to precisely place the chip on the PCB Pads. Check thoroughly to ensure that each terminal is aligned with its respective pad.
Schritt 3: Corner Tack Soldering
Put a little solder on the soldering iron tip to solder the diagonal corners of the chip and hold it in place. Recheck alignment before the next step.
Schritt 4: Flux Reapplication
Use the flux pen again to apply a fresh layer of flux over the pins and pads, ensuring smooth solder flow and preventing oxidation.
Schritt 5: Drag Soldering with a Mini W.ave T.ip
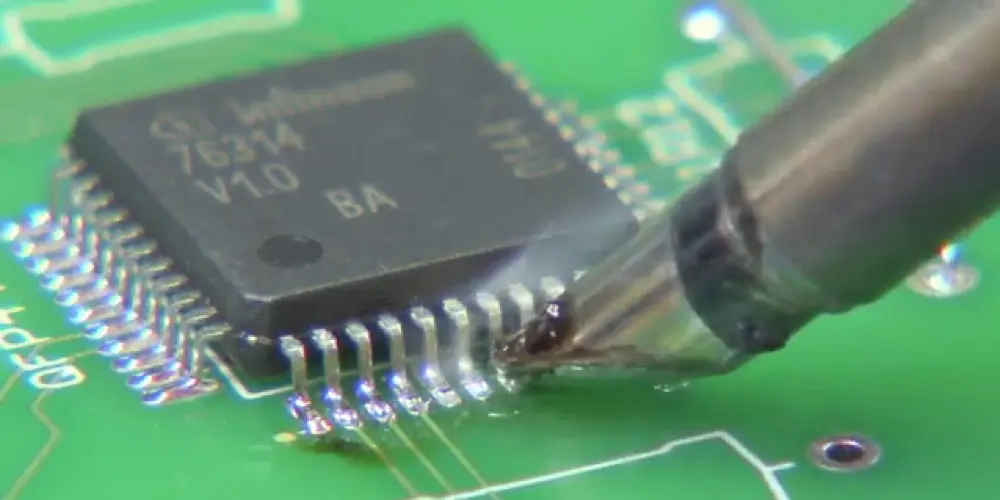
Use a mini wave tip to drag soldering, which has a solder reservoir at its head. Firstly load the reservoir with molten solder. Gently touch the outer ends of the pins and QFP pads with the tip. Slightly lift the tip by about 0.5 mm to allow molten solder to flow from the reservoir into the pad and pin area, forming a solder joint. In diesem Schritt, pay attention to the hand gestures. The axis of the soldering iron tip should form an angle of 30°to 45°with the edge to be soldered. Do not drag soldering too fast, and control it to drag through one soldering point in about 1 zweite.
Schritt 6: Endkontrolle & Reinigung
Once soldering, thoroughly inspect each solder joint under a microscope to check for any shorts or poor soldering that require rework. For short circuits, apply flux and re-drag (max 2 attempts per area). If the soldering is not done properly once, wait until it cools down before soldering again. (≤3 reworks total). While there are no defects, perform a clean process.
SMD-Löten mit Hot EINir Soldering Gun
Schritt 1: Pre-Soldering Inspection
Inspect the PCB pads for adequate solder bumps. If the solder amount is insufficient, apply a small amount of solder on the pads with a soldering iron. If there is no solder bump, deposit solder paste on the pads using the PCB stencil.
Schritt 2: Flussmittelanwendung
Apply flux to both the component pins and the pads to improve adequate wetting during the reflow process.
Schritt 3: Komponentenplatzierung
Use tweezers to position the SMD component accurately on the PCB pads. Make sure the leads are properly aligned with the pads.
Schritt 4: Vorheizen
Before soldering, use the hot air gun to gently preheat the area around the component. This prevents thermal shock and ensures even heating.
Schritt 5: Reflow Lötprozess
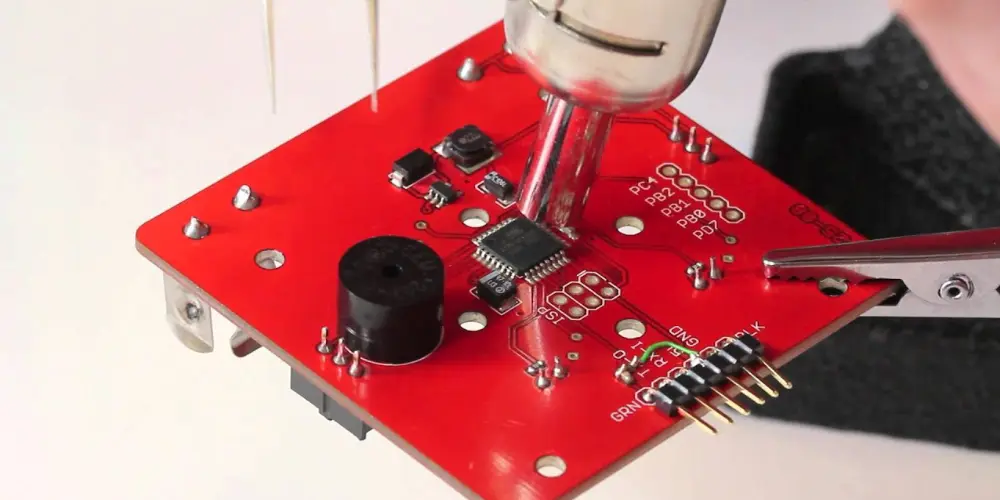
Apply hot air to the component evenly till the solder melts and reflows. For small SMD components, surface tension will help the component auto-align into the correct position. When working with QFP components, pay attention to pin alignment during heating. It’s recommended to solder one row of pins first, verify for alignment, and then solder the other rows.
Schritt 6: Endkontrolle & Reinigung
Nachdem der Lötvorgang abgeschlossen ist, inspect for any potential defects. Clean the circuit board with isopropyl alcohol and a brush or cotton swabs to eliminate any residual flux.
Tipps, die Sie während des Lötvorgangs beachten sollten
- Verwenden Sie die niedrigste wirksame Lötkolbentemperatur, um eine Beschädigung empfindlicher Komponenten zu vermeiden.
- Halten Sie die Lötspitze zwischen den Lötstellen sauber, um eine optimale Wärmeübertragung auf die Lötstelle zu gewährleisten.
- Apply just enough solder to form a proper fillet on each joint. Insufficient or excess solder can lead to unreliable connections.
- Beobachten Sie den Lotfluss und die Benetzung und tragen Sie bei Bedarf erneut Flussmittel oder Vorverzinnungspads auf.
- Berühren oder stoßen Sie die Leiterplatte nicht an, bis alle Lötstellen abgekühlt und ausgehärtet sind.
- Visually inspect underneath components like BGAs and QFNs if possible.
- Nehmen ESD prevention steps like grounding wrist straps and mats.
- Arbeiten Sie systematisch von der Mitte nach außen oder von kleinen zu größeren Bauteilen.
- Halten Sie die Pads kühl, indem Sie längere Hitze an einer Stelle vermeiden, um ein Abheben des Pads oder eine Beschädigung der Leiterplatte zu verhindern.
How to Do SMD Soldering Rework?
Die Überarbeitung des Lötens oberflächenmontierter Geräte ist ein heikler Prozess, aber eine wesentliche Fähigkeit für PCB-Reparatur und Modifikation. Dabei ist große Vorsicht geboten, Es ist möglich, SMD-Komponenten erfolgreich zu entlöten und auszutauschen, ohne die Platine zu beschädigen. We will then introduce how to do SMD soldering rework using a hot air soldering gun and a soldering iron.
Desoldering with a Soldering ichron
Apply flux on the component pins and select an appropriate soldering iron tip with 200-400℃ temperature. Heat the pins to melt the solder and remove the components with tweezers. The operation is slightly different for various types of components. The following are the specific details.
Two-Terminal SMD Components – Begin by applying solder to one end and heating it using the soldering iron. While the solder is melting, quickly heat the other end. When both ends are molten, use tweezers to remove the component. You can use two soldering irons to heat both ends at the same time.
Dual-in-Line-Paket (TAUCHEN) ICs – Apply flux to the pins, then pile solder along one row. Move the soldering iron along the row of pins to melt the solder. Insert tweezers between the IC and pads on the molten side and lift to separate the pins. Remove excess solder with a soldering iron or solder wick. Repeat the operation for the other side to remove the component thoroughly.
Quad Flat Package (QFP) ICs – Apply flux to the pins and solder wick. Place the solder wick over the row of pins and heat with a soldering iron. Insert a thin non-wettable steel shim between the pins and the pads to lift them. Repeat for all sides until the chip is off.
Desoldering with ein Hot Air Gun
Apply flux on the component pins and hold the components with tweezers. Preheat the components around with a hot air gun, then blow on the components. Do not stay in one place and move the hot air gun head quickly to heat each pin. When the pin solder is melted, remove the components with tweezers. Schließlich, clean the pads for re-soldering.
What you should keep in mind:
-Perform the overall pre-heating, usually for 30 Sekunden.
-Choose the gun tip according to the shape of the component, using a tubular gun tip in general.
-Keep the gun tip perpendicular to the circuit board as much as possible and about 10 mm away from it.
-Allgemein, set the wind speed to 1-3 levels and heat to 5 levels.
Abschließende Gedanken
Das SMD-Löten kann auf den ersten Blick entmutigend wirken, da mit lächerlich kleinen Bauteilen und Verbindungen gearbeitet wird. Aber mit etwas Übung, die richtigen Werkzeuge, und indem man einer soliden Technik folgt, Sie können Bauteile nahezu jeder Größe erfolgreich löten. Oberflächenmontierte Komponenten werden immer kleiner und die Platinen dichter gepackt, Das Erlernen von SMD-Lötkenntnissen wird für jeden PCB-Anfänger und Elektronik-Bastler zu einem Muss.